How to update the firmware
Warning
The firmware update should only be performed when connected to the VPU via the ETH0 interface and using a static IP address. It is recommended to use the default static IP address 192.168.0.69.
Download the firmware
The firmware image is available on the ifm.com website. Navigate to the site and follow the steps below:
Create an account (if you do not already have one) and log in.
Use the search bar to find the article number (OVP80x or OVP81x). This is also valid if you have pre-release sample units, for example M04239.
Navigate to the article page an click on the “Downloads” tab.
Select the firmware from the list. It will start downloading the file.
Starting firmware is version < 1.0.0
When updating to a firmware version 1.0.0 or above, starting with a firmware version below 1.0.0, please refer to the migration guide.
Starting firmware is version >= 1.0.0
(Optional) Save the current configuration
Depending on the starting and target firmware versions, the configuration might not be fully preserved after an update. To make sure you do not lose your configuration, we recommend saving it locally before performing the update.
You can for example do so using the command line interface:
ifm3d ovp8xx config get > config_save.json
With the ifmVisionAssistant
Download the ifmVisionAssistant from https://www.ifm.com/us/en/product/OVP800?tab=documents.
Note
Updating the firmware from 0.16.xx to 1.0.xx is currently not possible with the ifmVisionAssistant.
In the instructions below, we expect that the user extracted the downloaded ZIP containing the firmware file.
Open the Vision Assistant and connect to the OVP8xx,
Navigate to the
VPU Settingswindow and clickUpdateunder theFirmware Updatesection. The version beside theUpdatebutton refers to the current version running on VPU.Select the file and the update process will start.
Once the update is complete, the device will reboot.
Note
The firmware update using the iVA Linux AppImage may fail on the first attempt, causing the VPU to remain in recovery mode. If this happens, refer to the instructions below to reboot to productive mode, using the ifm3d API.
With the ifm3d API
In the instructions below, replace <path/to/firmware_image.swu> with the path to the firmware file you downloaded from ifm.com.
# Warning, the CLI syntax was updated with ifm3d v1.6.xx.
# Make sure you are using the right API version.
$ ifm3d ovp8xx swupdate flash <path/to/firmware_image.swu>
#include <ifm3d/device/o3r.h>
#include <ifm3d/swupdater/swupdater.h>
...
auto o3r = std::make_shared<ifm3d::O3R>();
auto sw = std::make_shared<ifm3d::SWUpdater>(o3r);
if (sw->FlashFirmware("<path/to/firmware_image.swu>")){
    sw->WaitForProductive();
    std::cout << "System ready!" << std::endl;
}
from ifm3dpy.swupdater import SWUpdater
from ifm3dpy.device import O3R
o3r = O3R()
sw = SWUpdater(o3r)
if sw.flash_firmware('<path/to/firmware_image.swu>'):
    sw.wait_for_productive()
    print("System ready!")
Note
The code snippets above do not show how to handle exceptions when they occur in the update process. Please refer to the API documentation for details on the potential exceptions thrown by each function.
Double check the firmware version after the update:
$ ifm3d ovp8xx config get --path /device/swVersion/firmware
ifm3d::json config = dev->Get({"/device/swVersion/firmware"});
o3r.get(["/device/swVersion/firmware"])
Rebooting to productive mode
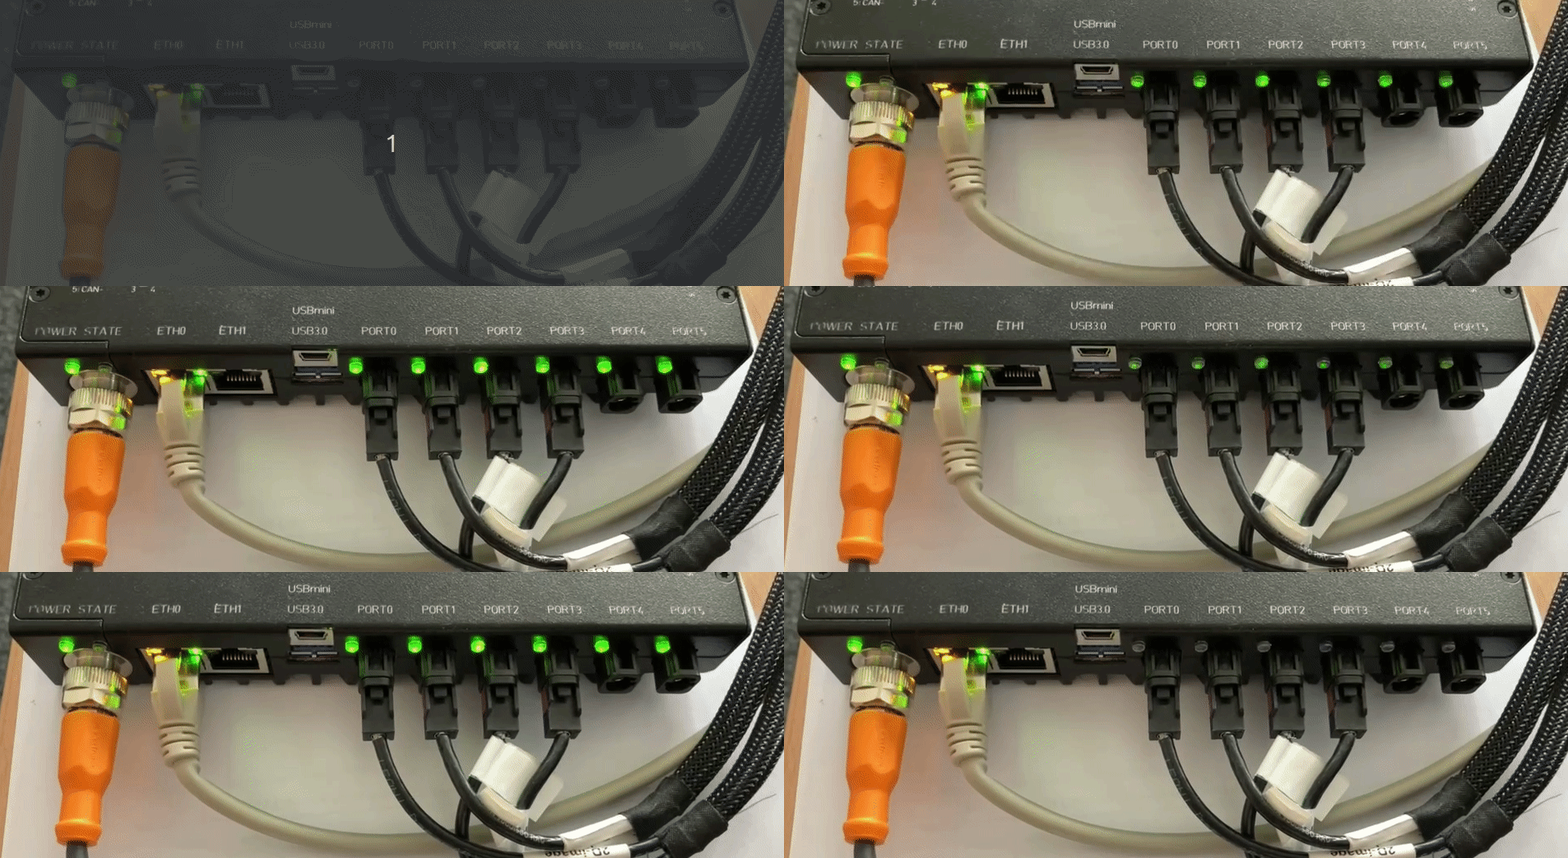
If you happen to be stuck in recovery mode, the device will not be “ping-able.” The LED behavior will look like below.

To reboot to productive, you have two options:
Option 1: Using ifm3d API
ifm3d ovp8xx reboot # Reboots the device to productive mode
/*
 * Copyright 2024-present ifm electronic, gmbh
 * SPDX-License-Identifier: Apache-2.0
 */
// This example shows the usage of SWUpdate Module
// https://api.ifm3d.com/stable/cpp_api/classifm3d_1_1SWUpdater.html

#include <ifm3d/device/o3r.h>
#include <ifm3d/swupdater/swupdater.h>
#include <iostream>

using namespace ifm3d::literals;

int main() {

    std::string IP = "192.168.0.69";

    auto o3r = std::make_shared<ifm3d::O3R>(IP);
    auto swu = std::make_shared<ifm3d::SWUpdater>(o3r);

    // swu->RebootToRecovery();
    // swu->WaitForRecovery();
    swu->RebootToProductive ();

}
################################################
# Copyright 2025-present ifm electronic, gmbh
# SPDX-License-Identifier: Apache-2.0
################################################
# This examples shows how to use SW Update Module
# https://api.ifm3d.com/stable/_autosummary/ifm3dpy.swupdater.SWUpdater.html#ifm3dpy.swupdater.SWUpdater
################################################
from ifm3dpy.device import O3R
from ifm3dpy.swupdater import SWUpdater

###################################
# Configure the IP and the path to
# the firmware file on your system
###################################
IP = "192.168.0.69"
TIMEOUT = 120000 # milliseconds
o3r = O3R(IP)
swu = SWUpdater(o3r)

# swu.reboot_to_recovery()
# swu.wait_for_recovery()
swu.reboot_to_productive()

if swu.wait_for_productive(TIMEOUT):
    print("System is booted to productive state")
else:
    print(f"System failed to boot to productive state in {TIMEOUT} milliseconds")
Option 2: Using Web Interface
When the device is in recovery mode, it opens the Software update webinterface at port 8080.
Open the webpage at http://<IP_ADDRESS_OF_VPU>:8080
Drop the .swu file. The firmware update begins and the system will boot into productive mode.
The full example script
We provide a full Python script to help you update the firmware using the API. You can find this script in the ifm3d-examples repository.